
WELCOME BACK!!!!
If you’re wondering where’s part 1, navigate here to get some context.
Let’s Go!!!
Snapshots Azure Synapse Analytics automatically takes snapshots throughout the day to create restore points that are available for 7 days. This retention period can’t be changed . Azure Synapse Analytics supports an 8-hour recovery point objective (RPO). You can restore a data warehouse in the primary region from any one of the snapshots taken in the past 7 days . The service also supports user-defined restore points. Manually triggering snapshots can create restore points of a data warehouse before and after large modifications . This capability ensures that restore points are logically consistent . Logical consistency provides additional data protection against workload interruptions or user errors for quick recovery time .
Querying SQL dedicated pools for backup/snapshots using Synapse Studio
- Navigate to the Azure Synapse Workspace and select ‘Overview’ from the left selection pane. Click on ‘Open In Synapse Studio’.
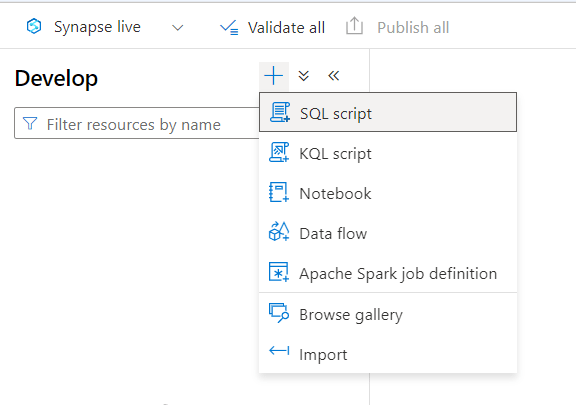
- Select ‘Develop’ from the left selection pane.
- Click on ‘+’ icon and select ‘SQL script’.
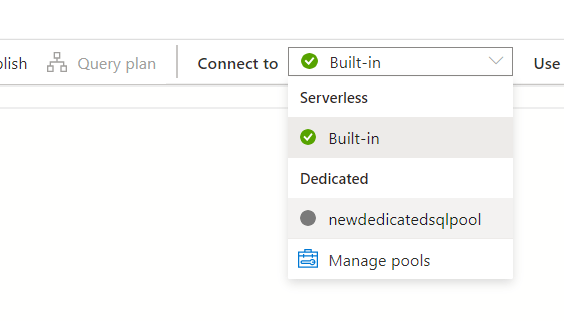
- Under the ‘Connect to’ drop down list, select the dedicated pool.
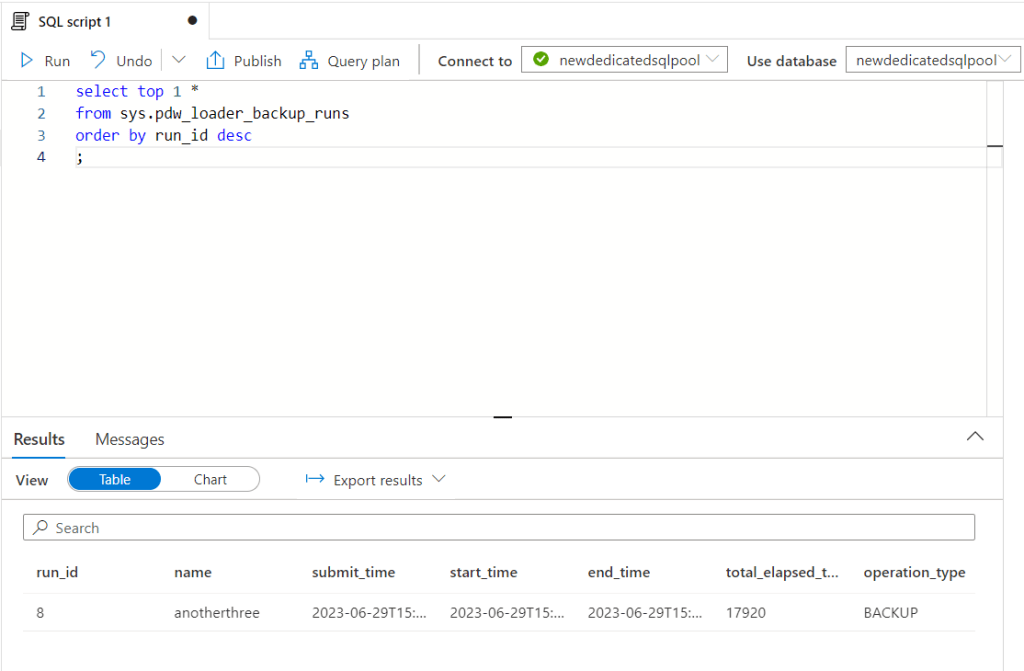
- Paste the below script to see when the last snapshot started. Users must run this query on their online dedicated SQL pool
select top 1 *
from sys.pdw_loader_backup_runs
order by run_id desc
;- Click on ‘Run’. This would return the details of the last snapshot run. To learn more about sys.pdw_loader_backup_runs refer to the documentation here.
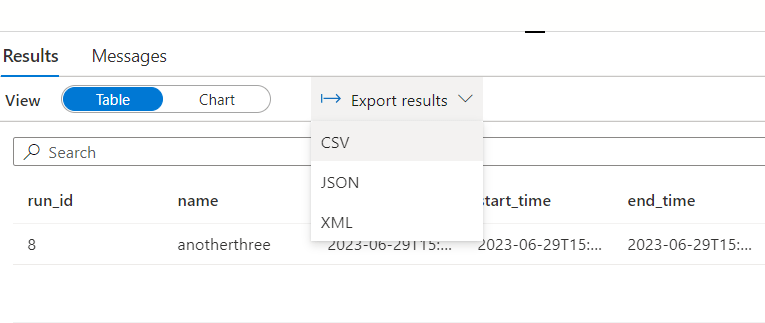
- Results can be exported to CSV, JSON, and XML. Select ‘Export results’ drop down above the results and choose the appropriate format.
Additionally, Users can list all the available restore points programatically by using the following methods:
Azure PowerShell
- For dedicated SQL pool (formerly SQL DW) Get-AzSqlDatabaseRestorePoint
- For dedicated SQL pool (within Synapse workspace) Get-AzSynapseSqlPoolRestorePoint
REST APIs
- For dedicated SQL pool (formerly SQL DW) Restore Points – List By Database
- For dedicated SQL pool (within Synapse workspace) Sql Pool Restore Points – List
Note: If you’re planning to use a PowerShell script to do a restore, make sure that you’re using the latest version of:
Exporting SQL dedicated pool backup logs to Log Analytics Workspace
A custom python script has been created to monitor the Synapse dedicated sql pool backup by querying the database using the sys.pdw_loader_backup_run_details system view and the exporting the results to a Azure Log Analytics Workspace. This table contain additional detailed information about ongoing and completed backup and restore operations in Azure Synapse Analytics and about ongoing and completed backup, restore, and load operations in Analytics Platform System (PDW).
import pyodbc
import json
import requests
from datetime import datetime, timedelta
import hmac
import hashlib
import base64

# Azure Synapse Dedicated SQL Pool configuration
server = '<synapse workspace name>.sql.azuresynapse.net'
database = '<dedicated sql pool>'
username = '<sql admin username>'
password = '<sql admin password>'
conn_str = f'DRIVER=ODBC Driver 17 for SQL Server;SERVER={server};DATABASE={database};UID={username};PWD={password}'


# Azure Log Analytics Workspace configuration
workspace_id = '<LAW ID>'
workspace_key = '<LAW primary or secondary key>'
api_version = '2016-04-01'
# Generate the current date and time in the required format
date = datetime.utcnow().strftime("%a, %d %b %Y %H:%M:%S GMT")
log_type = 'SynapseSQLQueryLog'

# Request details
content_length = 0
method = "POST"
content_type = "application/json"  # Replace with your actual content type if required
request_path = "/api/logs"  # Replace with your actual request path if required

# Function to generate LAW signature
def generate_log_analytics_signature(workspace_id, workspace_key, date, content_length, method, content_type, request_path):
    x_headers = 'x-ms-date:' + date
    string_to_hash = method + "\n" + str(content_length) + "\n" + content_type + "\n" + x_headers + "\n" + request_path
    bytes_to_hash = bytes(string_to_hash, encoding="utf-8")
    decoded_key = base64.b64decode(workspace_key)
    encoded_hash = base64.b64encode(hmac.new(decoded_key, bytes_to_hash, digestmod=hashlib.sha256).digest()).decode()
    authorization = "SharedKey {}:{}".format(workspace_id,encoded_hash)
    return authorization

# Function to post query results to LAW
def post_data(workspace_id, workspace_key, log_record_json, log_type):
    method = 'POST'
    content_type = 'application/json'
    request_path = '/api/logs'
    rfc1123date = datetime.utcnow().strftime("%a, %d %b %Y %H:%M:%S GMT")
    content_length = len(log_record_json)
    # Generate the authorization signature
    signature = generate_log_analytics_signature(workspace_id, workspace_key, rfc1123date, content_length, method, content_type, request_path)
    uri = 'https://' + workspace_id + '.ods.opinsights.azure.com' + request_path + '?api-version=2016-04-01'

    headers = {
        'content-type': content_type,
        'Authorization': signature,
        'Log-Type': log_type,
        'x-ms-date': rfc1123date
    }
    response = requests.post(uri,data=log_record_json, headers=headers)

# Query the Azure Synapse Dedicated SQL Pool
query = '''
    SELECT TOP 10 *
    FROM sys.pdw_loader_backup_runs
    ORDER BY end_time DESC
'''
try:
    # Connect to the SQL Pool
    with pyodbc.connect(conn_str) as conn:
        # Execute the query
        cursor = conn.cursor()
        cursor.execute(query)
        # Fetch the query results
        results = cursor.fetchall()
        # Iterate over the rows and send them to Azure Log Analytics
        for row in results:
            # Construct the log record
            log_record = {
                    "Run_ID": row[0],
                    "Backup_Name": row[1],
                    "Submit_Time": row[2],
                    "Start_Time": row[3],
                    "End_Time": row[4],
                    "Total_Elapsed_Time": row[5],
                    "Operation_Type" : row[6],
                    "Mode" : row[7],
                    "Database_Name" : row[8],
                    "Table_Name" : row[9],
                    "Principal_ID" : row[10],
                    "Session_ID" : row[11],
                    "Request_ID" : row[12],
                    "Status" : row[13],
                    "Progress" : row[14]
                    }
            # Convert the log record to JSON
            log_record_json = json.dumps(log_record, default=str)
            # Send the log record to Azure Log Analytics
            post_data(workspace_id, workspace_key, log_record_json, log_type)

except pyodbc.Error as ex:
            print(f"An error occurred while executing the SQL query: {str(ex)}")
Under Azure Log Analytics Workspace configuration, the workspace ID can be fetched by following the steps below:
- Navigate to Azure portal and search for ‘Log analytics workspace’
- On the overview page of the selected log analytics workspace page, locate the field ‘Workspace ID’ and enter it in the workspace_id parameter in the script
- From the left pane selection pane, select ‘Agents’
- Click on ‘Linux Servers’ tab on top of the page and expand the ‘Log Analytics agent instructions’. Copy the primary or secondary key and place it in the workspace_key parameter in the script
Deploy script using Azure Function App
Deploy an Azure function app using the console. Sometimes there are issues when deploying a function to a function app that was deployed using the console. In such cases, deploy a function app using the VS code and then deploy the function to the function app again using the VS code.
A new function will be deployed to the function created in previous section using Visual Studio Code. Users will be required to install the Azure Functions Extension for Visual Studio Code.
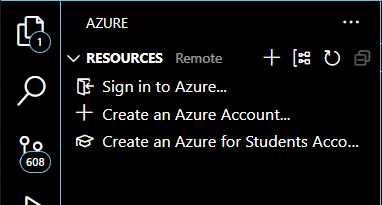
- Under ‘Resources’ section, sign in to Azure account
- · Select the Azure extension icon from the left selection pane
- · Under Resources section, select the Azure Function App previously deployed by drilling down from Subscription where the function app resides.
- · Under the Resources section, expand the ‘WORKSPACE’ section and click on the thunderbolt icon to create a function.

- · Provide the folder location for storing and compiling the function code and files.
- · Select Python as language
- · Skip virtual environment
- · Select Timer Trigger and give it a name
- · Set the Authorization level as Function and open the session in a new window
- · Open terminal and navigate to where the function code is located
- · Open the file python file named as ‘__init__.py’ by default and replace the code with above script
- · Open requirements.txt and add below:
azure-functions
pyodbc
requests- Open local.settings.json file and add below in the existing values. This is to avoid function deployment fails throwing log messages around Oryx builds:
"FUNCTIONS_WORKER_RUNTIME": "python",
"ENABLE_ORYX_BUILD": false,
"SCM_DO_BUILD_DURING_DEPLOYMENT": false- Save and deploy the function using Visual Studio Code by clicking on the cloud icon

- Select the function app from the drop down menu at the top of the window in Visual Studio Code
- Wait for the function to be deployed. Once deployed, validate by navigating to the Azure portal and looking for the deployed function under function app
- Once the function is deployed, check the VS code console output
Validation of Query Results in Log Analytics Workspace
- Navigate to the Log Analytics Workspace where the query results are being sent
- Click on tables and look for the table name ‘SynapseSQLQueryLog’ which was set in the script earlier
- Now click on ‘Logs’ from the selection pane on the left side of the window
- Under Tables tab, expand the ‘Custom Logs’ button and double click ‘SynapseSQLQueryLog’
- Set the time range and click Run
- Expand the results to see table rows with details of backup runs on dedicated sql pool
Trigger for Azure Functions
Keeping simplicity in mind, a Timer Trigger was used to get triggered after set intervals. For testing purposes, the schedule can be set to trigger the function after every 10 minutes by setting the cron job to “0 */10 * * * *”.
Alert rules and Action Groups
Navigate to the Log Analytics Workspace using the Azure portal. Follow the steps below to create Alert rules and action groups that will get triggered based off logs fed into Logs Analytics Workspace from Synapse dedicated SQL pool.
- Under the Monitoring section on the selection pane on the left side of the window, click on Alerts
- Click on ‘Create’ and select Alert Rule
- Select ‘Custom log search’ from the drop down list for Signal Name
- In the ‘Search query’ section, enter the table name SynapseSQLQueryLog
- Under Measurement section, select ‘Table rows’ from the drop down list from Measure
- Aggregation type stays as ‘Count’
- Set the Aggregation granularity
- Don’t Split the Resource ID column
- Set the first dimension as ‘Status_s’, operator as ‘=’, and dimension value as ‘COMPLETED’ depending on the use case. Uncheck the ‘Include all future values’
- Set the second dimension as ‘Progress_d’, operator as ‘=’, and value ‘100’. Uncheck the ‘Include all future values’
- Set the Alert logic
- Click on Actions and create an Action Group
- Select the Resource Group. Set the Action group name and Display name
- Under Notification Type, select Email/SMS message/Push/Voice and set the name
- On the right side of the window, add and email by providing an email address
- Skip the Actions step
- Add tags and create the Action group
- Once the Action group is created, navigate back to alert rules page and continue creating the alert rule
- Select the Resource group
- Provide the Alert Rule Name, description, and region
- Add tags, review and create
Once the alert rule is created, an email alert will be fired to the provided email address after a successful backup/snapshot of synapse dedicated sql pool.
